


Made by Corrine Paul
2010
2010
Basic Paper Bag Album instructions
Step by step directions
Materials
- 3 Paper Bags (any size)
- Hole punch tool
- Eyelets, book rings, ribbon or fibres to bind
- lots of good stuff to cover and embellish your pages
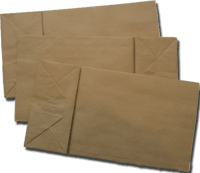
| 1. Take your 3 paper bags and lay them on top of each other alternating the ends. Corrine's NOTE: I use six 6x6 paper lunch bags for my paper bag albums. | |
| 2. Fold them in half to create a book. Notice how the three open ends each form a pocket. Punch three to five holes along the spine. Corrine's NOTE: As you can see by my example at the top of this post I punch 2 holes in my paper bag albums. | 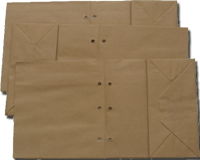 |
| 3. Set an eyelet in each hole and / OR thread a couple of lengths of ribbon or fibre (or a combo of both!) through each hole and tie off. Corrine's NOTE: I use Book Rings in the holes and tie my ribbon to that. You can find Book Rings in the office supply area of WalMart, Meijer, etc... | 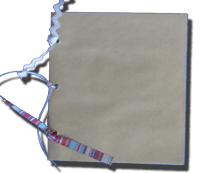 |
| 4. Decorate your album as you choose using a variety of papers, embellishments, ribbon and any other creative elements in your scrapbooking stash. | 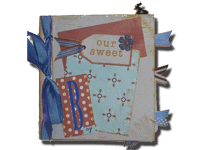 |
| 5. Create at least 3 large tags slightly smaller than the album itself to fit into the three pockets formed by the paper bags. Use them to hold extra photos or journalling. | 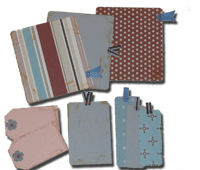 |
Paperbag Album Tips
- I sometimes find it easier to decorate each page of the album before I bind it together.
- Try different binding methods like, bind-it-all o-rings, paper binding, metal binding clips, brads, eyelets, book-rings, Japanese stab binding or ribbon.

excuse me but can you remove this tutorial that was written by me for http://www.scrapbook-crazy.com/paper-bag-album-instructions.html.
ReplyDeletePlease try to refrain from stealing content created by other.
thanks.