
2010
Instructions & Pattern from Scrapbook-crazy
http://www.scrapbook-crazy.com/matchbook-album-instructions.html
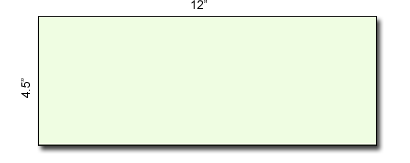
Materials - 1 strip of 12"x4.5" card stock for the album cover (double sided patterned card is awesome for this cover)
- 4 - 8 pieces of 4.5"x5" for the pages of the album
- Stapler and staples
- patterned paper + embellishments to decorate
The final product will have up to 8 pages and will measure approx 5.25"x4"
Putting the mini album together
| Trim a strip of cardstock 4.5"x 12" long. This will form the outer cover for the album so ensure it is firm card. Double sided patterned cardstock is good to use. |
| |
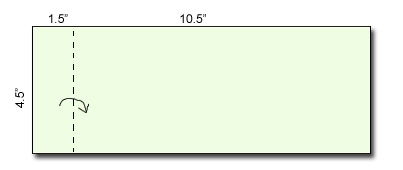
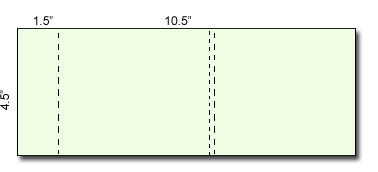
| Measure from the left hand side 1½", score it and fold the flap in towards the centre. |
| |
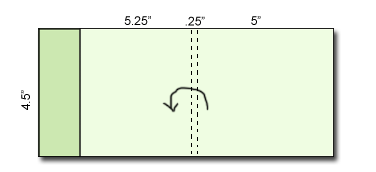
| From this fold measure another 5¼", score and fold again. From the opposite end measure 5", score and fold. This should give you a ¼" gutter at the bottom. |
| |
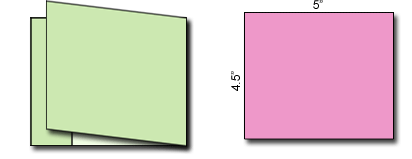
| Now cut 4-8 pages from cardstock. They should each measure 5"x4.5". At this stage I find it easier to embellish the pages now before we assemble the matchbook and bid it together. |
| |
| Open up the album cover. |
| |
| Place the pages, one on top of the other inside the matchbook with the edges flush against the first left hand fold as pictured below. |
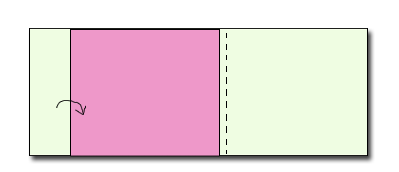 |
| Fold the 1½" flap over the pages and staple in the centre |
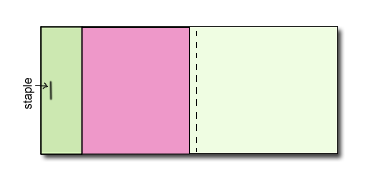 |
| Fold the 5" flap over and tuck under the 1½" flap. All done |
 |




No comments:
Post a Comment