http://acreativeneed.wordpress.com/2009/08/21/mini-backpack-album-tutorial/
I am so excited to share this with you!!
A few weeks ago I was asked by Peata of Scrapbook Crazy if I would be interested in sharing a tutorial for a mini scrapbook album with them. Of course I was, and ideas started dancing in my head. Since she said she would be including it in the upcoming newsletter, I immediately thought a back to school project would be a fun idea.
I have been busy buying my boys school supplies (two long lists) clothes, and backpacks, so, I think with all things school related going through my head, I came up with this idea of a making a mini backpack album. The tutorial was featured a few days ago on Scrapbook-Crazy HERE. (Peata’s kind words made me blush!)
I had a lot of fun working on this, thanks to Peata for inviting me to do it!! Have a look at Peata’s blog , it is positively overflowing with great ideas for mini albums and scrapbooking creativity!! She is super sweet too!!
I hope you like the tutorial too, I’ve include a lot of photos as I am a visual learner myself, so I always think it helps with the instructions.
Please let me know what you think, and if you try one, I would love it if you would let me know so I can see yours!!
Mini Backpack Album Tutorial
Materials:
11″ x 3″ strip of sturdy card stock for the backback frame
11″ x 2 3/4″ strips (x2) of card stock for inside album pages
4″ x 2 1/2″ decorative papers (inside album pages)
3″ x 2 3/4″ piece of sturdy decorative paper or paper covered card stock (top flap)
5″ x 5″ square decorative paper (pocket) NOT card stock
2 1/4″ x 2 1/4″ square card stock (pocket top flap)
2 brads
2 strong mini magnets
4 eyelets
2 8″ pieces of Ribbon
adhesive, crop a dile or eyelet setter, scoring tool
Backpack Frame Assembly
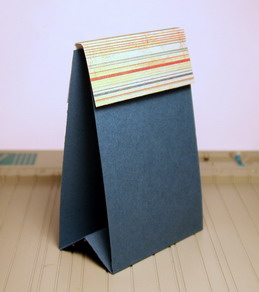
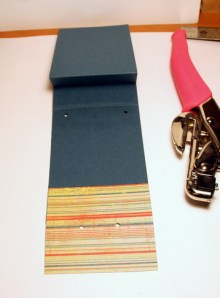
1. Score 11″ strip at 4 1/2″, 5 1/2″, and 6 1/2″ . Crease and fold up the center to create a tent fold. (see photo)
2. Score top flap piece (3″ x 2 3/4″) at 1 1/4″, and 1 1/2″
3. Adhere flap piece to top back of backpack.
Front Pocket Assembly
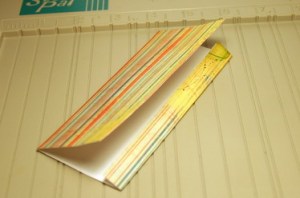
1. Score 5″ x 5″ square at 1/2″ in on one end so you have a 5″ x 4.5″ piece. Score at 2 1/4″ (center) and fold in half adhering top edge to folded 1/2″ edge.
2. Fold in half (upwards) to create a double pocket. Using a circle punch, punch through top 4 layers to create a semi circle opening in both pockets.
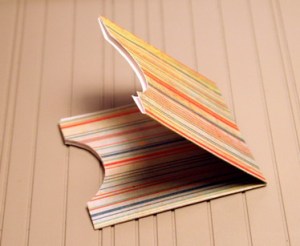
3. Score 2 1/4″ x 2 1/4″ pocket flap at 1″, and 1 1/4″. Adhere to top back of pockets to create flap.

Inside Page Assembly
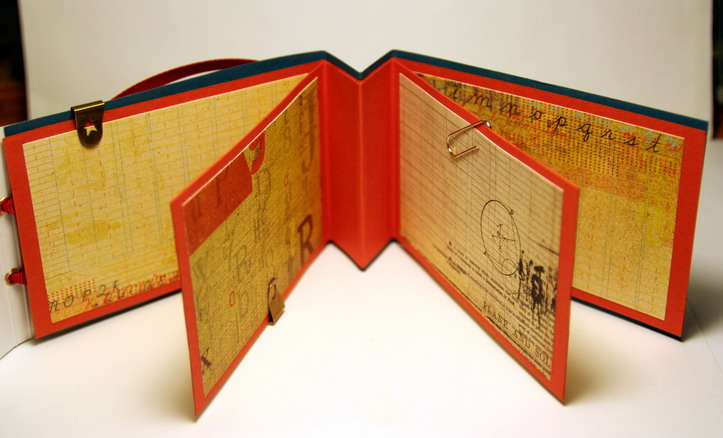
1. Score 11″ x 2 3/4″ strips at 4 1/2″, 5 1/2″ and 6 1/2″. Trim the short ends by 1/8″ for a better fit inside frame.
2. Adhere center tent folds only to inner frame tent fold.
3. Adhere decorative pieces (4″ x 2 1/2″) to the page inserts and add embellishments and photos etc.

Final Assembly
1. Place brads on lower front of flaps. Line up with mini magnets and adhere the magnets to the main frame and pockets.
2. Set 2 eyelets in top flap of backpack 1″ apart. Set other 2 eyelets at the bottom of backpack 2″ apart.
3. Thread the ribbons through and knot on inside to secure, for backpack straps.
4. Adhere double pocket to front of backpack.

Here is the finished view:

The double front pockets are perfect for tucking in small notes, or folded ticket stubs etc. The pages have room for up t0 8 standard wallet sized photos.
I was thinking that this would would make perfect school commencement gifts for students to fill with their favorite summer photos to share with classmates, or with new school friend photos and happenings through the year. I can’t wait to give my 8 year old son this one. He loves taking photographs and has been all summer! I know he’s going to love having a place of his own to put them!!


No comments:
Post a Comment