CLICK HERE FOR FREE BLOGGER TEMPLATES, LINK BUTTONS AND MORE! »

About the Celebrating Ordinary Moments Blog

Mission Statement
Thank you for checking out my blog. I started this blog to create a place where people are able to find inspiration and share ideas. I find myself surfing the web looking for inspiration that is unique and different. If I find an interesting tutorial I'll share it with you. I will include a "live" link back to the original blog, store or web site so that you may have the option to visit and learn more about the designer and other services, class or kits they may offer. By posting tutorials I am hoping to help inspire people that are interested in creating something fresh and new.


Terms of Use for my Personal Designs or Patterns.
When listing completed projects on eBay, blogs, etsy, facebook, personal websites, forums or online venues, or if using these patterns for a project submitted to magazines or other publications, it is required that credit be given to Corrine Paul in a reasonably visible way. Example; “Pattern used from Corrine Paul http://celebratingordinarymoments.blogspot.com/."

Tuesday, November 23, 2010

Apron Shaped Recipe Book Tutorial

Hello Everyone, I wanted to share this tutorial with you. If you want to know more about the designer and other services, page kits or classes they may offer please visit their blog, store or web site. Enjoy!

http://jenniferpriest.blogspot.com/2008_10_05_archive.html

Our Family Recipes
Apron-Shaped Recipe Book


"Our Family Recipes" Mini Book

Preserve your family’s favorite recipes in this adorable apron-shaped mini album! We’ll be using the Zutter Bind-It-All and Creative Imaginations paper to create this book filled with pockets to store your treasured recipes. The book folds into an easel so the recipes are easy to view while cooking. This project would be the perfect gift for the cook in your family, newlyweds, or for the holidays!

Supplies: Adhesive (3D Foam Squares, glue dots, and a liquid adhesive), ink (red, brown, green), Crop A Dile, Scissors, Foam Paint Brush.

Trick or Treat File Folder Album Tutorial


Made by Corrine Paul

Made October 2010
5 Mats for photos and/or journaling. 3 pull out tags for 6 more photos and/or journaling. Size: 31/2 inches wide x 6 inches tall. I journaling box for additional journaling, Ribbons, brads, flowers, paper clips an embossing thread used throughout the album. I used my Cricut baby bug to cut the fonts and I printed Halloween photo titles from my microsoft fonts.


Fall Fun 12 x 12 Layout Tutorial

Hello Everyone, I wanted to share this tutorial with you. If you want to know more about the designer and other services, page kits or classes they may offer please visit their blog, store or web site. Enjoy!

http://laurenscreative.blogspot.com/2010_11_01_archive.html


Super easy layout today! This layout also marks the end of my fall layouts for awhile - woohoo! I know that this one isn't necessarily "fall" in a traditional sense, but I tend to like lighter brighter colors. I took "fall" colors like, orange, yellow, rust and went a few shades lighter. I did use my Imagine again, but I used Straight from the Nest for most of the cuts. That means that you could recreate this layout really easily by using your favorite patterned paper even if you don't have an Imagine.


I printed out the cloud paper a few weeks ago on flat white cardstock - you can see the difference between the flat cardstock and the textured cardstock I used for the yellow patterned paper. It's not that the flat cardstock looks bad, I just like the more substantial look of the textured cardstock.


Materials Used:
  • 12 x 12 piece of kraft cardstock (Recollections brand - Michael's)
  • "sky" 6 x 11 - Imagine Best Friends Cartridge
  • "grass" 5 x 11 - Imagine Hopscotch Cartridge
  • Photo Mats - Hopscotch Cartridge (yellow polka dots)
    • I printed a 12 x 12 piece of patterned cardstock and trimmed it down to the sizes I needed.
    • 4 1/2 x 4 1/2 and 4 1/4 x 4 1/4
    • 4 1/2 x 6 1/2 and 4 1/4 x 6 1/4
  • "Tree" sized at 5" from Straight from the Nest
  • "Fall" sized at 2" from Straight from the Nest
  • "fun" sized at 3" (using real dial size) from Sweet Treats
  • Tim Holtz Distress Ink - Frayed Burlap
  • Sakura Gelly Roll Pen - White
  • Sakura Micron 03 Pigment Pen - Black
  • 3/8" Double Faced Satin Ribbon - Michael's
  • Buttons - Michael's
    • attached using glue dots

Don't forget that the Scrappy Moms sneak peeks start tomorrow, so there should be LOTS of great inspiration!

WOO Loves You Mini Album Tutorial

Hello Everyone, I wanted to share this tutorial with you. If you want to know more about the designer and other services, page kits or classes they may offer please visit their blog, store or web site. Enjoy!

For a few months now, I have been thinking about making my nephew a little book of family photos. He loves pointing out everyone in pictures and reading, so this will be perfect for him! Most important to me is making it durable, fun and kid friendly.

Planning
First things first, I always plan my mini albums out. Here are the planning steps I go through:
1. Pick my topic.
2. Pick major products – mini album type and patterned papers.
3. Create a page + picture list.
4. Gather potential embellishments.
Now let’s go through these steps:
Topic? Done. Major products?


I was inspired to finally put this album together when I first saw this Maya Road Owl Coaster set. Perfect! And it inspired my title: “Who loves you?” I love the play on words! But what paper to use? I wanted to make sure I got something bright and colorful. Kid friendly? My thought it to go with something distressed so that it will help hide the dings and love this kid is going to give it! Obvious choice is to use some Basic Grey and I’m in love with the new Wander collection, so easy choice!
Usually at this point, I would gather all potential embellishments. In this case, I’m going to make this book the opposite of my normal work - minimal embellishment. I don’t want those cute little hands ripping off and chewing on anything small that might be a choking hazard!

Designing

I usually come up with a basic design for the pages – it makes it go more quickly in assembly. For this album, I wanted to keep it simple and fun. Each owl will have a photo, a basic frame for the photo, a name and one small paper or sticker embellishment. Alongside creating a design for the layout, I usually create a gameplan… a page + picture list:


Building

Once I get to this stage, I want to get done as quickly as possible.
First, I grabbed all my owls, some coordinating colors of Maya Mist and sprayed five of the owls on the back side to begin building my mini album. I kept the colors light so I could add a second layer of texture with stamps. I’m trying to add some depth without thick embellishments.


Then, I cut out seven owls – one for the front cover, one for the back cover, and one each for the front side of the pages. I did this by just holding one of the chipboard owls up to my paper and using it as my cutting guide.

Finishing
Now for the final steps, building the covers and sealing the album.
The covers were the most fun! I used the embossed image that came on the chipboard as a paper piecing template by tracing it onto tracing paper and cutting it out by hand. I then sketched out what I thought the owl would look like from behind and cut that out too. I used my tracing paper templates to cut out the patterned paper. I glued it all down with permanent adhesive.


Once all the misting, stamping, gluing and distressing was done, I added one last layer of distressing by inking the edges with distress ink. Then, I added my papers, photos, names and small embellishment to finish the pages. To make these as kid friendly as possible, I printed the photos out on smooth cardstock to make the final step of the mini album easier.
Next the critical kid proofing step… modge podge! I grabbed a big bottle of it, some foam brushes and then got to work. I covered one side first, let it dry and then repeated on the other side.


Now it’s all shiny and kid proof! A simple ring to hold it all together and it’s ready to go!!

Tri-Shutter Mini Album

Hello Everyone, I wanted to share this with you. If you want to know more about the designer and other services, page kits or classes they may offer please visit their blog, store or web site. Enjoy!

http://mypapercottage.blogspot.com/2010/11/tri-shutter-mini-album-november-30th.html

Come make this unique album for anyone on your
list this holiday season!


Tri-Shutter Mini Album

Summer Theme Cricut Mini Album Tutorial

Hello Everyone, I wanted to share this tutorial with you. If you want to know more about the designer and other services, page kits or classes they may offer please visit their blog, store or web site. Enjoy!

http://nettiepsworld.blogspot.com/2010/07/summer-theme-album-for-cricut-mini.html

Summer Theme Album for Cricut Mini Albums Design Team

Here's the Summer album that I promised you all. I made this album for my 10 year old to document her summer. I have added pocket pages to save ticket stubs, extra photos, and bookmarks for added journaling. Also there a couple lift the flap pages so that she can add more hidden journaling or photos.


Cover:
Sun- Doodle Charms
2010- Graphically Speaking
Summer- Straight from the Nest
My- Don Juan


Bubbles- A Child's Year
Fish- Create-a-Critter


Books- Locker Talk
Rounded rectangle- Gypsy Wanderings
Welded together with Gypsy to make Bookmark


Watermelon- Doodle Charms

Back to School Back Pack Mini Album You Tube Video

Hello Everyone, I wanted to share this tutorial with you. If you want to know more about the designer and other services, page kits or classes they may offer please visit their blog, store or web site. Enjoy!


My Teddy Bear 12 x 12 Pre Made Pages

Made by Corrine Paul
2010
I created these little bears and I wrote the poem. You may use the poem and the bear pattern as long as you include that they are my designs.


Trip 2010 Mini Album Tutorial

Hello Everyone, I wanted to share this tutorial with you. If you want to know more about the designer and other services, page kits or classes they may offer please visit their blog, store or web site. Enjoy!

http://www.mousepotatodesigns.com/?p=3015

This is a mini album I made of our trip in September 2010 to Museum Of The Rockies, Lewis & Clark Caverns, Beartooth Nature Center and over the Beartooth Pass.

mpd-trip2010-minialbum-1

This is the front cover. Both the front and back covers are made from medium weight chipboard. The whole book is cut from a SVG file I created to cut in Sure Cuts A Lot on my Cricut. I used grommets to enforce the ring holes and edge the whole book in gray paint.

mpd-trip2010-minialbum-2

This is a side view of the mini which is about 3.5 to 4 inches thick. It has 32 pages plus the 2 covers for total of 64 photos. I used 6 small rings instead of 2 large so that the rings wouldn’t stick out so far on the binding of the mini. I dont like to add ribbon and such to my family minis as it just gets all smooshed when its being stored.

mpd-trip2010-minialbum-3

Pretty much all the pages but a couple have a single photo matted in white cardstock. The photos area cut all the same size making for quick assembly. I did add some journaling and embellishments to the book but as you see I really wanted it to be a mini album about the photos not all the embellishments.

mpd-trip2010-minialbum-5

For each place we went I created pockets to hold memorabilia such as our rental papers, receipts, brochures etc.

mpd-trip2010-minialbum-4

Some of the photos I even cut up and added smaller photos on top of the larger photos for adding more detail in small spaces.

Thanks for looking!!

Supplies Used:

6 binder rings
gray paint
4 grommets
K&Company Road Trip 12 x 12 Die Cut Paper Pad
Photos
Crop-A-Dial

Monday, November 22, 2010

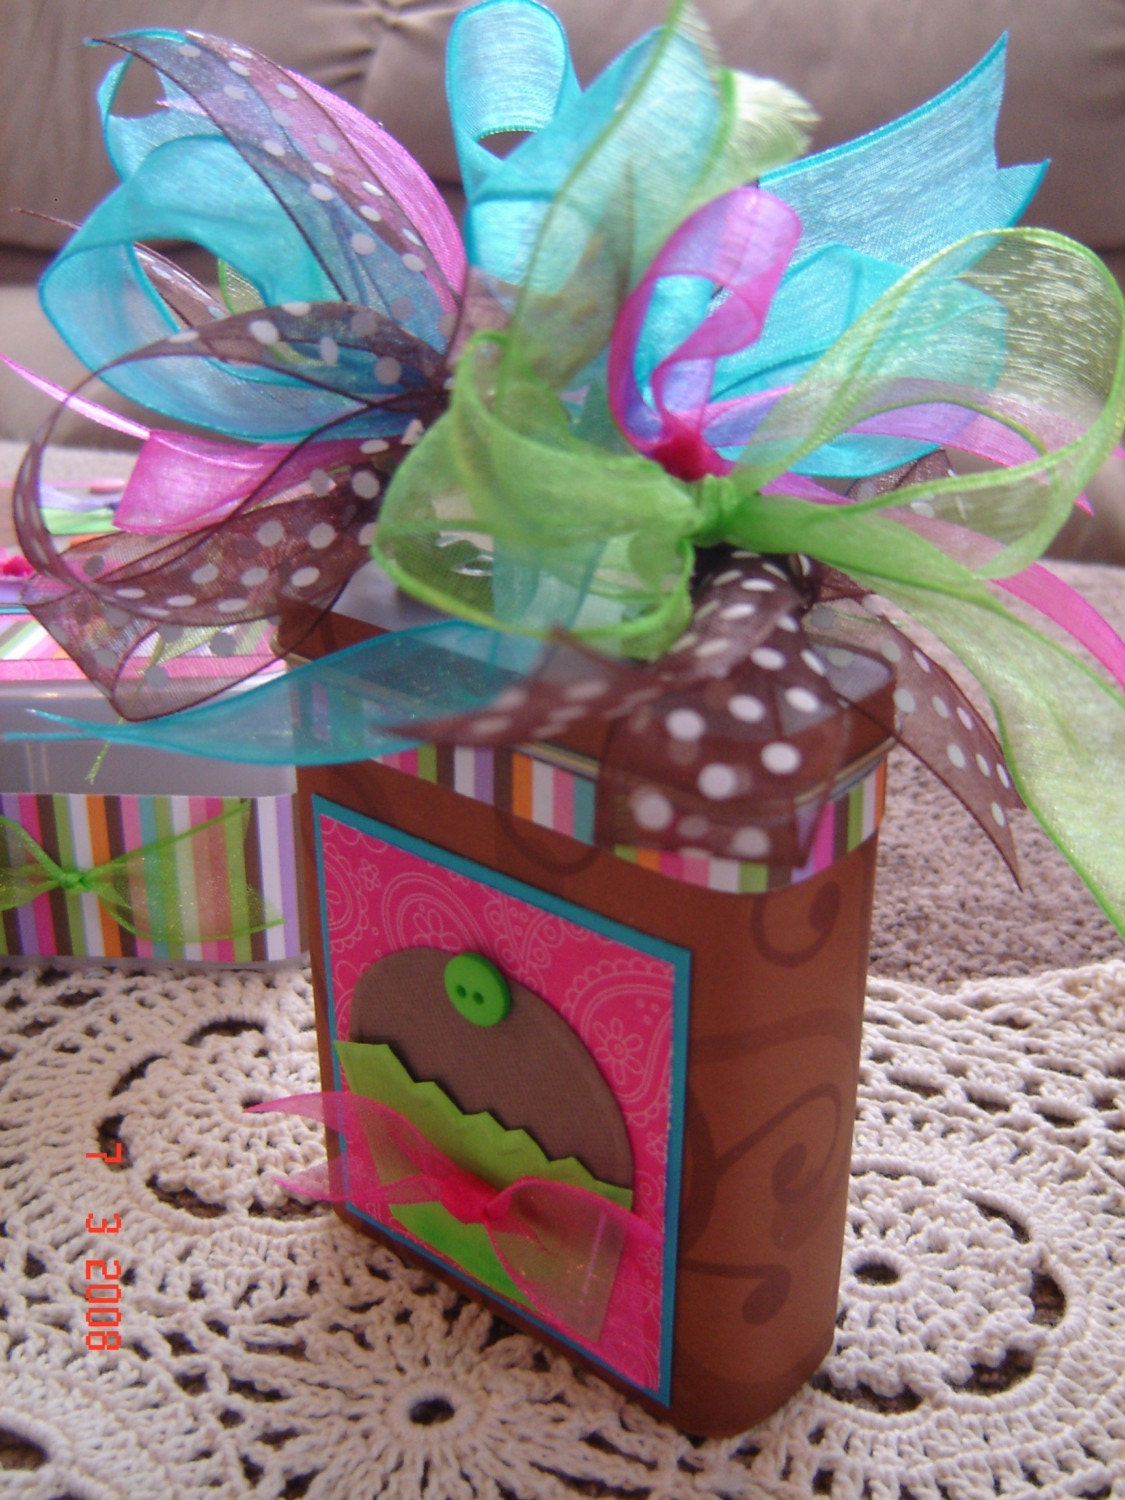
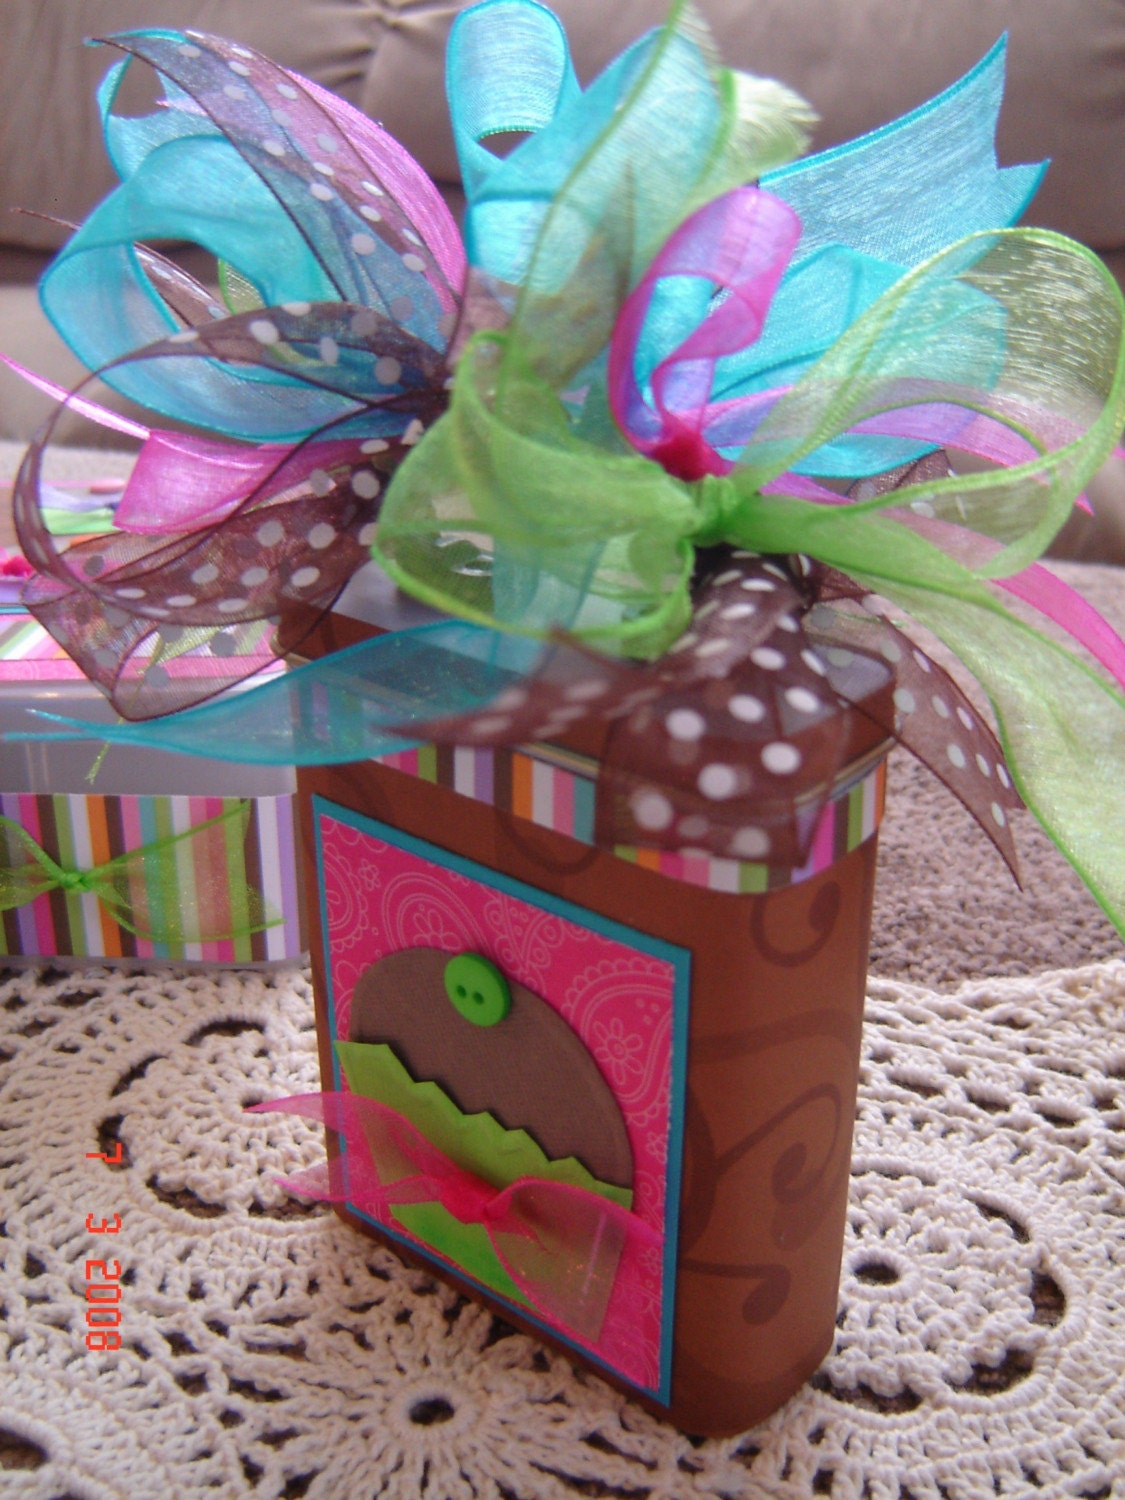
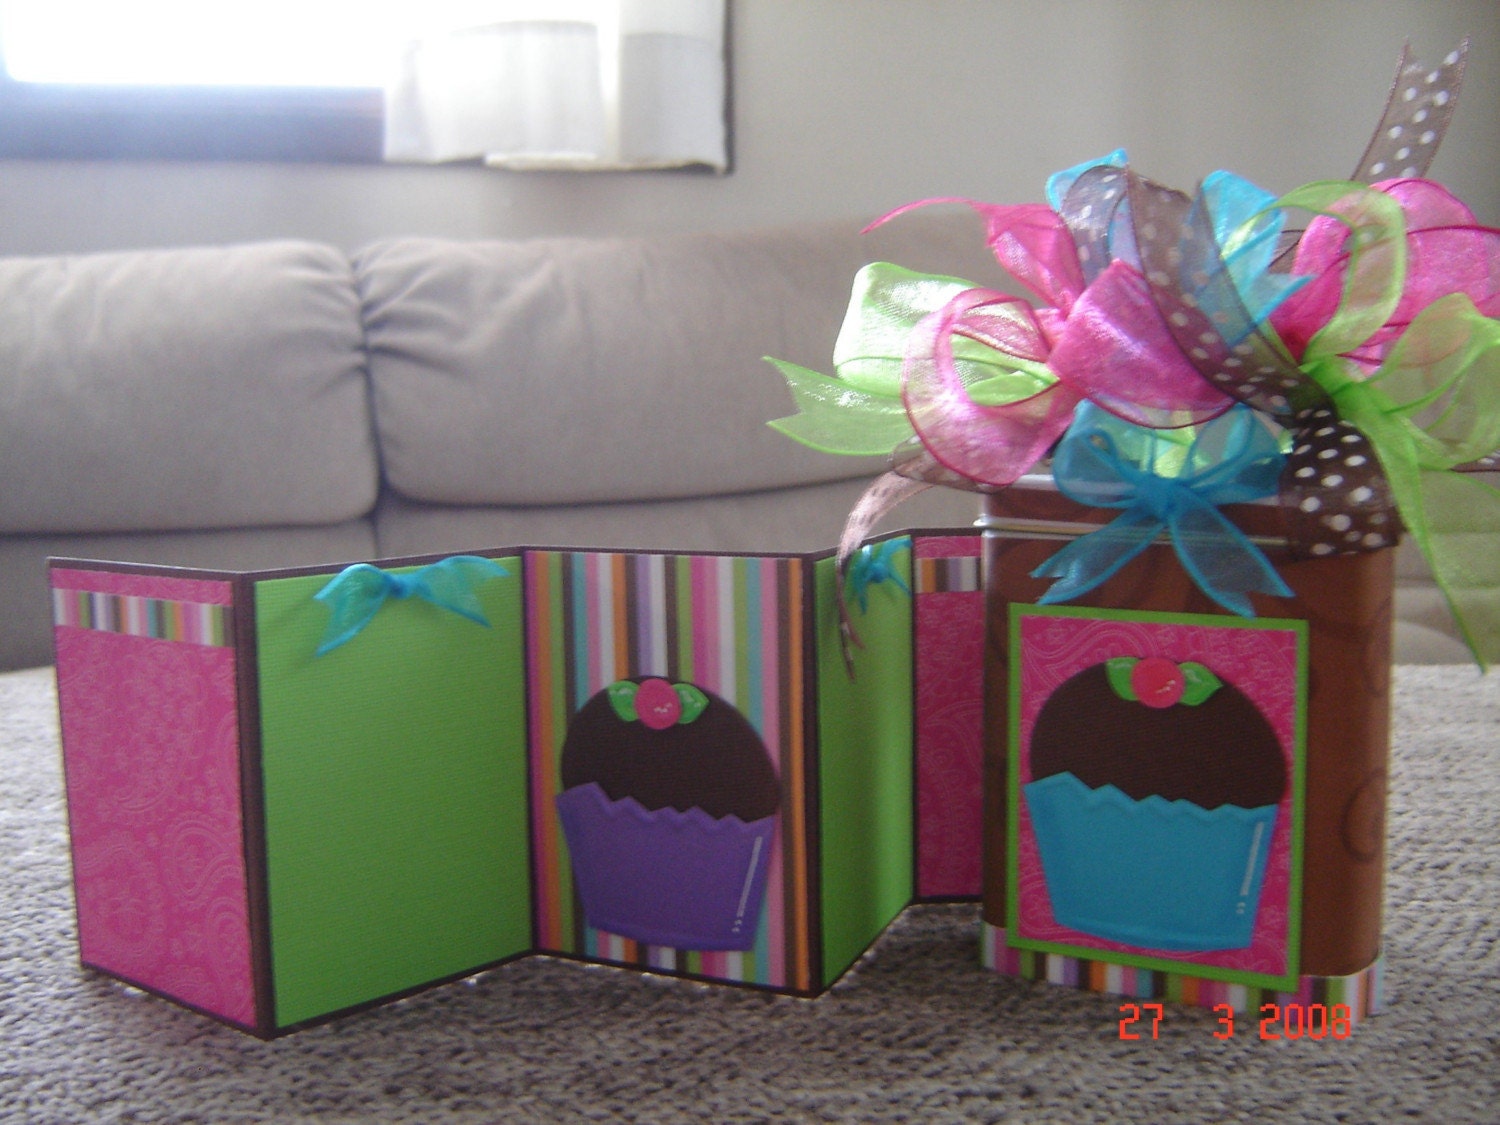
Cupcake Band Aid Tin and Mini Album

Hello Everyone, I wanted to share this with you. If you want to know more about the designer and other services, page kits or classes they may offer please visit their blog, store or web site. Enjoy!

http://www.etsy.com/listing/31605974/cupcake-band-aid-tin-and-mini-album

From foofndoodles

Cupcake Band Aid Tin and Mini Album
zoom
Cupcake Band Aid Tin and Mini Album Cupcake Band Aid Tin and Mini Album Cupcake Band Aid Tin and Mini Album Cupcake Band Aid Tin and Mini Album

This would be perfect for a birthday or a cupcake lover! Think of it as a gift for a college girl going back to the dorm! This tin is adorable all foofed up with lots of ribbon and gorgeous papers. The cupcake is a handmade embellishment I made using the dry embossing technique. It comes with a sweet 5 page mini album that fits perfectly inside the tin and can be used to display pictures! Just picture it on a shelf or mantle, or on your desk at work!

Band aid tin measures: 3.75"tall (without the ribbon foof) x 2.75" wide by 1" deep.

Disney Gate Fold Paper Bag Album Tutorial


Hello Everyone, I wanted to share this tutorial with you. If you want to know more about the designer and other services, page kits or classes they may offer please visit their blog, store or web site. Enjoy!

http://scrappincatscreativeendeavors.blogspot.com/2010/04/this-is-my-disney-gatefold-paper-bag.html

This is my Disney gatefold paper bag album. My inspiration came from the followingthepapertrail.blogspot.com. Her video tutorials are awesome! You have to check her out.


There are 6 paper bags making up the pages.


The open end of the bag allows for slipping in a tag for additional photos or journaling.


I cut the tags on my cricut. 3 in. tag for journaling or small photos and a 6 in. tag for photos.


The adorable paper is mostly from a Disney kit by EK Success.


The covers are made from chip board scavenged from Wheat Thins packaging. I am SSSOOOO green!


I included a view over the top of the album. Without photos or other embellishment yet and it is already almost an inch wide