

CLICK HERE FOR FREE BLOGGER TEMPLATES, LINK BUTTONS AND MORE! »

About the Celebrating Ordinary Moments Blog

Mission Statement
Thank you for checking out my blog. I started this blog to create a place where people are able to find inspiration and share ideas. I find myself surfing the web looking for inspiration that is unique and different. If I find an interesting tutorial I'll share it with you. I will include a "live" link back to the original blog, store or web site so that you may have the option to visit and learn more about the designer and other services, class or kits they may offer. By posting tutorials I am hoping to help inspire people that are interested in creating something fresh and new.


Terms of Use for my Personal Designs or Patterns.
When listing completed projects on eBay, blogs, etsy, facebook, personal websites, forums or online venues, or if using these patterns for a project submitted to magazines or other publications, it is required that credit be given to Corrine Paul in a reasonably visible way. Example; “Pattern used from Corrine Paul http://celebratingordinarymoments.blogspot.com/."

Monday, November 22, 2010

Mini Backpack Album Tutorial


Hello Everyone, I wanted to share this tutorial with you. If you want to know more about the designer and other services, page kits or classes they may offer please visit their blog, store or web site. Enjoy!

http://acreativeneed.wordpress.com/2009/08/21/mini-backpack-album-tutorial/

Backpack photos 30

I am so excited to share this with you!!

A few weeks ago I was asked by Peata of Scrapbook Crazy if I would be interested in sharing a tutorial for a mini scrapbook album with them. Of course I was, and ideas started dancing in my head. Since she said she would be including it in the upcoming newsletter, I immediately thought a back to school project would be a fun idea.

I have been busy buying my boys school supplies (two long lists) clothes, and backpacks, so, I think with all things school related going through my head, I came up with this idea of a making a mini backpack album. The tutorial was featured a few days ago on Scrapbook-Crazy HERE. (Peata’s kind words made me blush!)

I had a lot of fun working on this, thanks to Peata for inviting me to do it!! Have a look at Peata’s blog , it is positively overflowing with great ideas for mini albums and scrapbooking creativity!! She is super sweet too!!

I hope you like the tutorial too, I’ve include a lot of photos as I am a visual learner myself, so I always think it helps with the instructions.

Please let me know what you think, and if you try one, I would love it if you would let me know so I can see yours!!

Mini Backpack Album Tutorial

Materials:

11″ x 3″ strip of sturdy card stock for the backback frame

11″ x 2 3/4″ strips (x2) of card stock for inside album pages

4″ x 2 1/2″ decorative papers (inside album pages)

3″ x 2 3/4″ piece of sturdy decorative paper or paper covered card stock (top flap)

5″ x 5″ square decorative paper (pocket) NOT card stock

2 1/4″ x 2 1/4″ square card stock (pocket top flap)

2 brads

2 strong mini magnets

4 eyelets

2 8″ pieces of Ribbon

adhesive, crop a dile or eyelet setter, scoring tool

Backpack Frame Assembly

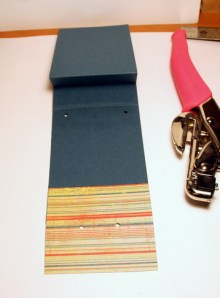
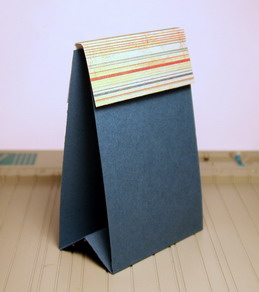
1. Score 11″ strip at 4 1/2″, 5 1/2″, and 6 1/2″ . Crease and fold up the center to create a tent fold. (see photo)

2. Score top flap piece (3″ x 2 3/4″) at 1 1/4″, and 1 1/2″

3. Adhere flap piece to top back of backpack.
IMG_9046 BP 4 30

Front Pocket Assembly

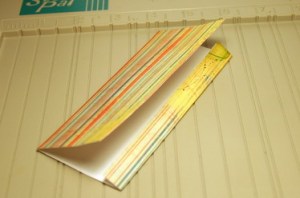
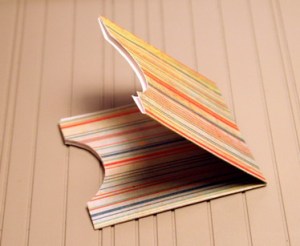
1. Score 5″ x 5″ square at 1/2″ in on one end so you have a 5″ x 4.5″ piece. Score at 2 1/4″ (center) and fold in half adhering top edge to folded 1/2″ edge.

2. Fold in half (upwards) to create a double pocket. Using a circle punch, punch through top 4 layers to create a semi circle opening in both pockets.
IMG_9049 BP 5 30IMG_9051 BP 6 30

3. Score 2 1/4″ x 2 1/4″ pocket flap at 1″, and 1 1/4″. Adhere to top back of pockets to create flap.

IMG_9052 BP 7 30

Inside Page Assembly

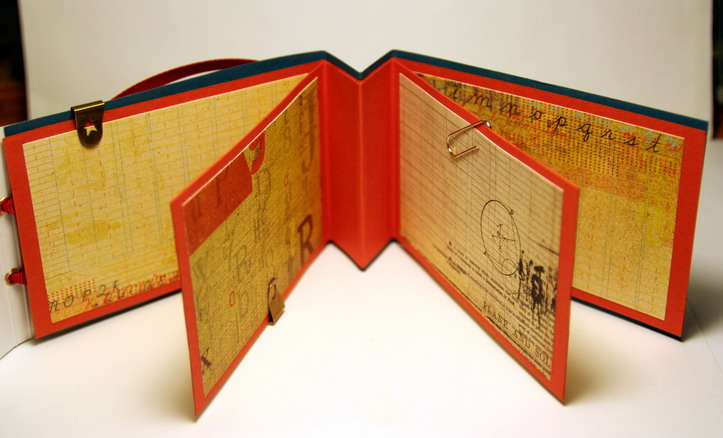
1. Score 11″ x 2 3/4″ strips at 4 1/2″, 5 1/2″ and 6 1/2″. Trim the short ends by 1/8″ for a better fit inside frame.

2. Adhere center tent folds only to inner frame tent fold.

3. Adhere decorative pieces (4″ x 2 1/2″) to the page inserts and add embellishments and photos etc.

IMG_9066 BP 12 30

IMG_9070 BP 13 30

Final Assembly

1. Place brads on lower front of flaps. Line up with mini magnets and adhere the magnets to the main frame and pockets.

2. Set 2 eyelets in top flap of backpack 1″ apart. Set other 2 eyelets at the bottom of backpack 2″ apart.

3. Thread the ribbons through and knot on inside to secure, for backpack straps.

4. Adhere double pocket to front of backpack.

IMG_9058 BP 10 30IMG_9056 BD 8 30

Here is the finished view:

IMG_9064 BP 11 30

The double front pockets are perfect for tucking in small notes, or folded ticket stubs etc. The pages have room for up t0 8 standard wallet sized photos.

I was thinking that this would would make perfect school commencement gifts for students to fill with their favorite summer photos to share with classmates, or with new school friend photos and happenings through the year. I can’t wait to give my 8 year old son this one. He loves taking photographs and has been all summer! I know he’s going to love having a place of his own to put them!!

Spooky Nights Mini Album Tutorial

Hello Everyone, I wanted to share this tutorial with you. If you want to know more about the designer and other services, page kits or classes they may offer please visit their blog, store or web site. Enjoy!

http://mmscrapshoppe.blogspot.com/2010/09/spooky-nights-mini-album.html


If you know me, you know I LOVE mini albums! I've preached on them in the past
(see this post), and swear by them.

Not only do I love to make them from scratch, but I love a good kit, too.

Enter the Spooky Nights kit from The Button Farm!

The Spooky Nights mini album is an accordian album inside of a tin can.

Attached to the inside of the tin is a page with two flaps. The top has the date 2008 on it, in honor of our son's 1st Halloween. I'll put a note here about his first Halloween and the experiences he had.

Inside the tin is the cover of the accordian album itself.

The accordian album contains 10 pages. My plan is put a photo best representing each Halloween on each page for the next 10 years. How that for extending the life of a mini album! By the time my son turns 10, I will have a great album to look back on.

The last page of the accordian album is adhered to the inside of the bottom of the tin.

I used my super trusty Beacon 3-in-1 adhesive to put the entire album together so I know it will never fall apart.

Like I said earlier, this was a kit, a what a kit!! Angela, who runs The Button Farm and puts these kits together, does an amazing job at putting instructions together for you to complete these intricate albums together all on your own.

Full page, detailed instructions with photos!

And like any great kit, there are TONS of leftovers!

I had the pleasure of taking a class from Scrap Queen Angela herself last year at the CKC Nashville convention. It was the first time my girlfriends and I ventured to take an intermediate class so we were a bit intimidated. Such a waste of worry! Angela was the most laid back teacher ever, and encouraged us to complete our albums the way we want, not just the way suggested by her (not that her way ended being the cutest anyway...).

Um, yeah, so that's me totally cheesing in my picture with Angela. She really does rock! She's holding the mini album we worked on during her class.

So, of course, when I got to her booth at the convention later I knew it would be completely worthwhile to purchase any of her albums. I was on a Halloween kick (I swear 2/3 of what I bought at that show was Halloween related!) so the Spooky Nights album was calling my name!

LIFE UNSCRIPTED Chunky Mini Album

Hello Everyone, I wanted to share this with you. If you want to know more about the designer and other services, page kits or classes they may offer please visit their blog, store or web site. Enjoy!

http://www.etsy.com/listing/32467607/life-unscripted-chunky-display-mini

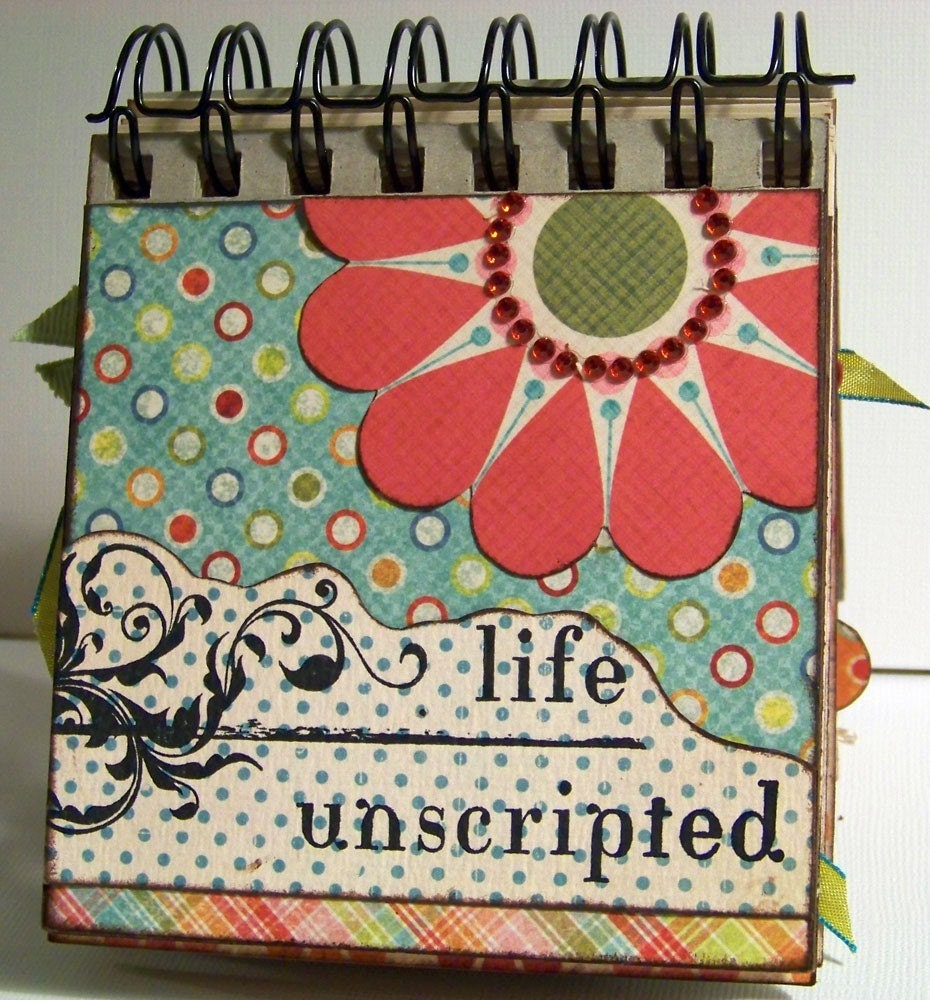
LIFE UNSCRIPTED Chunky Display Mini Album - PROJECT KIT
zoom
LIFE UNSCRIPTED Chunky Display Mini Album - PROJECT KIT LIFE UNSCRIPTED Chunky Display Mini Album - PROJECT KIT LIFE UNSCRIPTED Chunky Display Mini Album - PROJECT KIT LIFE UNSCRIPTED Chunky Display Mini Album - PROJECT KIT LIFE UNSCRIPTED Chunky Display Mini Album - PROJECT KIT
Life is what you make it! And with our brand new project kit you can showcase ALL of the people, places, and things that make YOUR life uniquely yours!

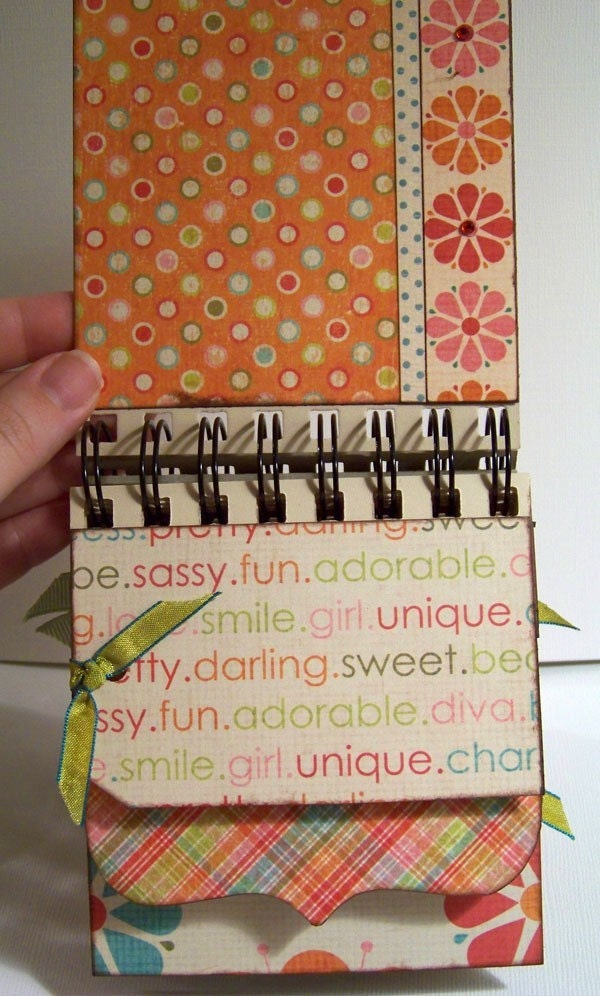
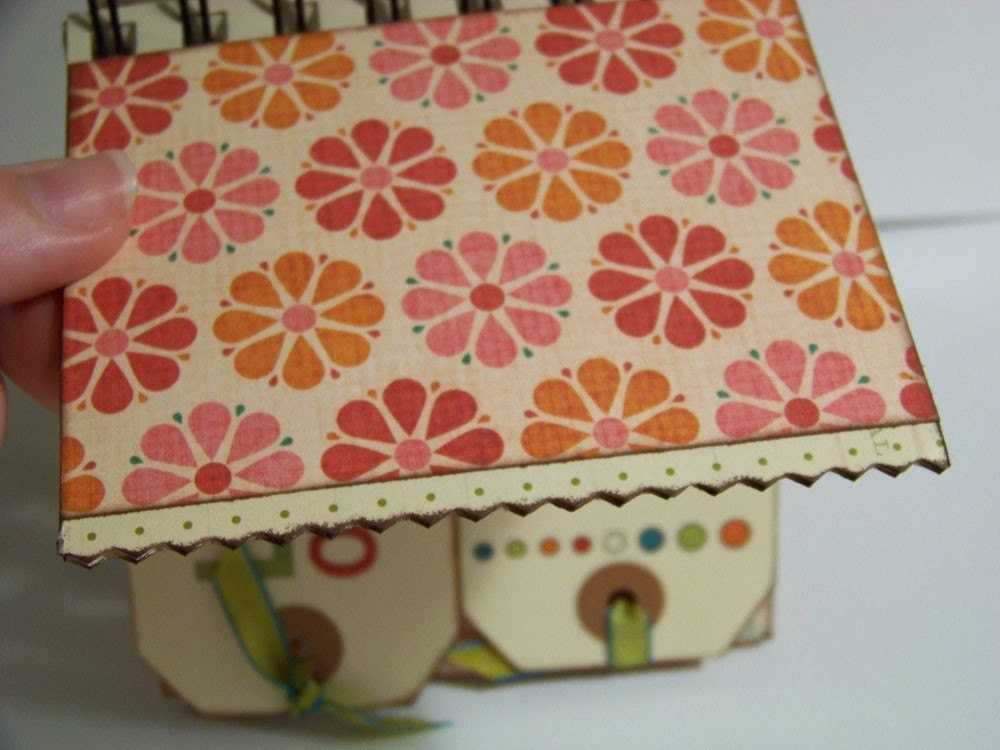
This 4x4 mini album kit when completed will have 36 pages(when you count front and back of album pages)! It will also be sturdy and chunky enough to stand up on it's own for display. AND this album comes with a 'twist' on the usual mini album. Our instructions and materials will show you how to alter the shape and size of some of the album pages. Turn plain square pages into ones with bracket, scallop, and ric-rac edges, as well as create tag pages! It's SO EASY! This album is full of fun, bright colors and patterns, bling, tags and more! Each kit comes with all the materials you need including complete directions and full color pictures.

Kit Contents:

My Minds Eye - Just Dreamy Papers
1 12x12 Sheet Candy Stripe
1 12x12 Sheet Funky Flowers
1 12x12 Sheet Check Her Out
1 12x12 Sheet That's My Girl
1 12x12 Sheet In Bloom
1 12x12 Sheet Bubblegum Girl
1 12x12 Sheet Dotty Dude
1 6x12 Sheet MME Tres Jolie Collection - Mon Cherie Girl

1 4x4 Rusty Pickle Mini Album
5 4X6 Sheets Making Memories Noteworthy Journal pgs
1 pkg. Me&My Big Ideas Circle Rhinestone Stickers(Multi-colored)
1 6X12 sheet WeRMemory Keepers Nonsense Rub-ons
1 0.5oz bottle of Aqua Stickles Glitter Glue
1 Imaginisce brown brad button
1 "Life Unscripted" hand stamped title
8 manilla shipping tags
2 cardstock flower shapes
1 cardstock arrow
2 buttons
1 red paperclip

Autumn Mini Album How About Them Apples Tutorial

Hello Everyone, I wanted to share this tutorial with you. If you want to know more about the designer and other services, page kits or classes they may offer please visit their blog, store or web site. Enjoy!

http://www.fiskarscrafts.com/articles/t_autum09minibook.aspx

Designer: Katrina Simeck
Fall is definitely my favorite time of year – and apply picking is one of my favorite harvest activities! Mini-albums are a great way to showcase a photos & details of all of your seasonal traditions.

I started with this cute apple-shaped mini album from Maya Road. Trimming paper around an album like this is the perfect task for the Fiskars Fingertip Craft Knife. After each page was covered with patterned paper (I used various papers from October Afternoon),

I added 2x2 photos. In keeping with the rounded shape of the album, I used Fiskars Round the Bend corner punch to round the corners of each photo.

One of my favorite new tools – the Lace & Lattice Border and Corner punch – makes it so easy to create cute photo mats!

I wanted to keep the back side of each page plain, but also interesting. The solution? First, I cut the shape of the album out of Core’dinations cardstock using Fiskars No. 5 non-stick scissors. I used Fiskars Texture Plates & Texturing tool to emboss the cardstock…then lightly sanded to bring the detail out. Simple, but cute!

It’s great to keep Fiskars squeeze punches & border punches handy when making a mini-album. That way, you’ll always have to tools to make the most out of your mini!

Back To School Mini Album-You Tube Video

Hello Everyone, I wanted to share this tutorial with you. If you want to know more about the designer and other services, page kits or classes they may offer please visit their blog, store or web site. Enjoy!


Friday, November 19, 2010

About Me

Hello

My name is Corrine and I love to design and create scrapbooks for my family, my friends and for FUN! I especially like to make mini albums. I do not have a professional scrapbook room or unlimited money to spend on my hobby. I am like most of you, I have limited space and limited funds so I have to make the most of what I have. I usually make one LARGE scrapbook a year for our family photos. I host a once a month scrapbook day in my home for family and friends. We talk, snack and share scrapbook ideas. I try to attend crops whenever & where ever I can. I love to learn new techniques and I enjoy sharing what I have learned with others. That is the main reason I wanted to start this blog, so that I am able to exchange ideas and stories with others that like to do the same. I would like to post tried and true techniques, current trends along with simple and easy scrapbook ideas. My scrapbook style would be described as crisp, clean and simple. The main focus in my scrapbooks are the photos and NOT the layout itself. A layout should enhance your photos and not over whelm them. If your interested in scrapbooking on a budget then this is the blog for you~

Just click on the Facebook image and post your
comments, photos, layouts, projects and stories~

Happy Scrapping

Corrine