


WELCOME
I am very excited about our first ONLINE WORKSHOP. Together we will work together and make this cute RECIPE CARD HOLDER. You can use ANY 4 or 5 inch bear pattern you have. I personally used the LSHD, Little Scraps of Heaven Designs, Bear Rough Edge Pattern.
You do not have to make a recipe card holder. You can make this cute little chef bear to use in a layout, on a card, as a tag etc. Please leave a comment at the bottom and let me know if you like this kind of a workshop and if you are participating~ thank you
You'll need White, Black and Rusty Brown Cardstock.

Made by Corrine Paul
Bear Pattern Used: Little Scraps of Heaven Designs
Chef Uniform designed by Corrine Paul

Supplies Needed:
*6 inch Jumbo Clothespin
You do not need this to make the chef bear.
I bought this one at Hobby Lobby for $2.33.
*Small Hole Punch
*Basic Kit: Scissors, adhesive, cutting system, pencil, white marker, ink or chalk.

For small projects like this I cut my paper in smaller pieces.

I usually rub a pencil across the back of the pattern then transfer the pattern to my cardstock. I cut on the outside of the line to leave room to customize the fit of each piece.

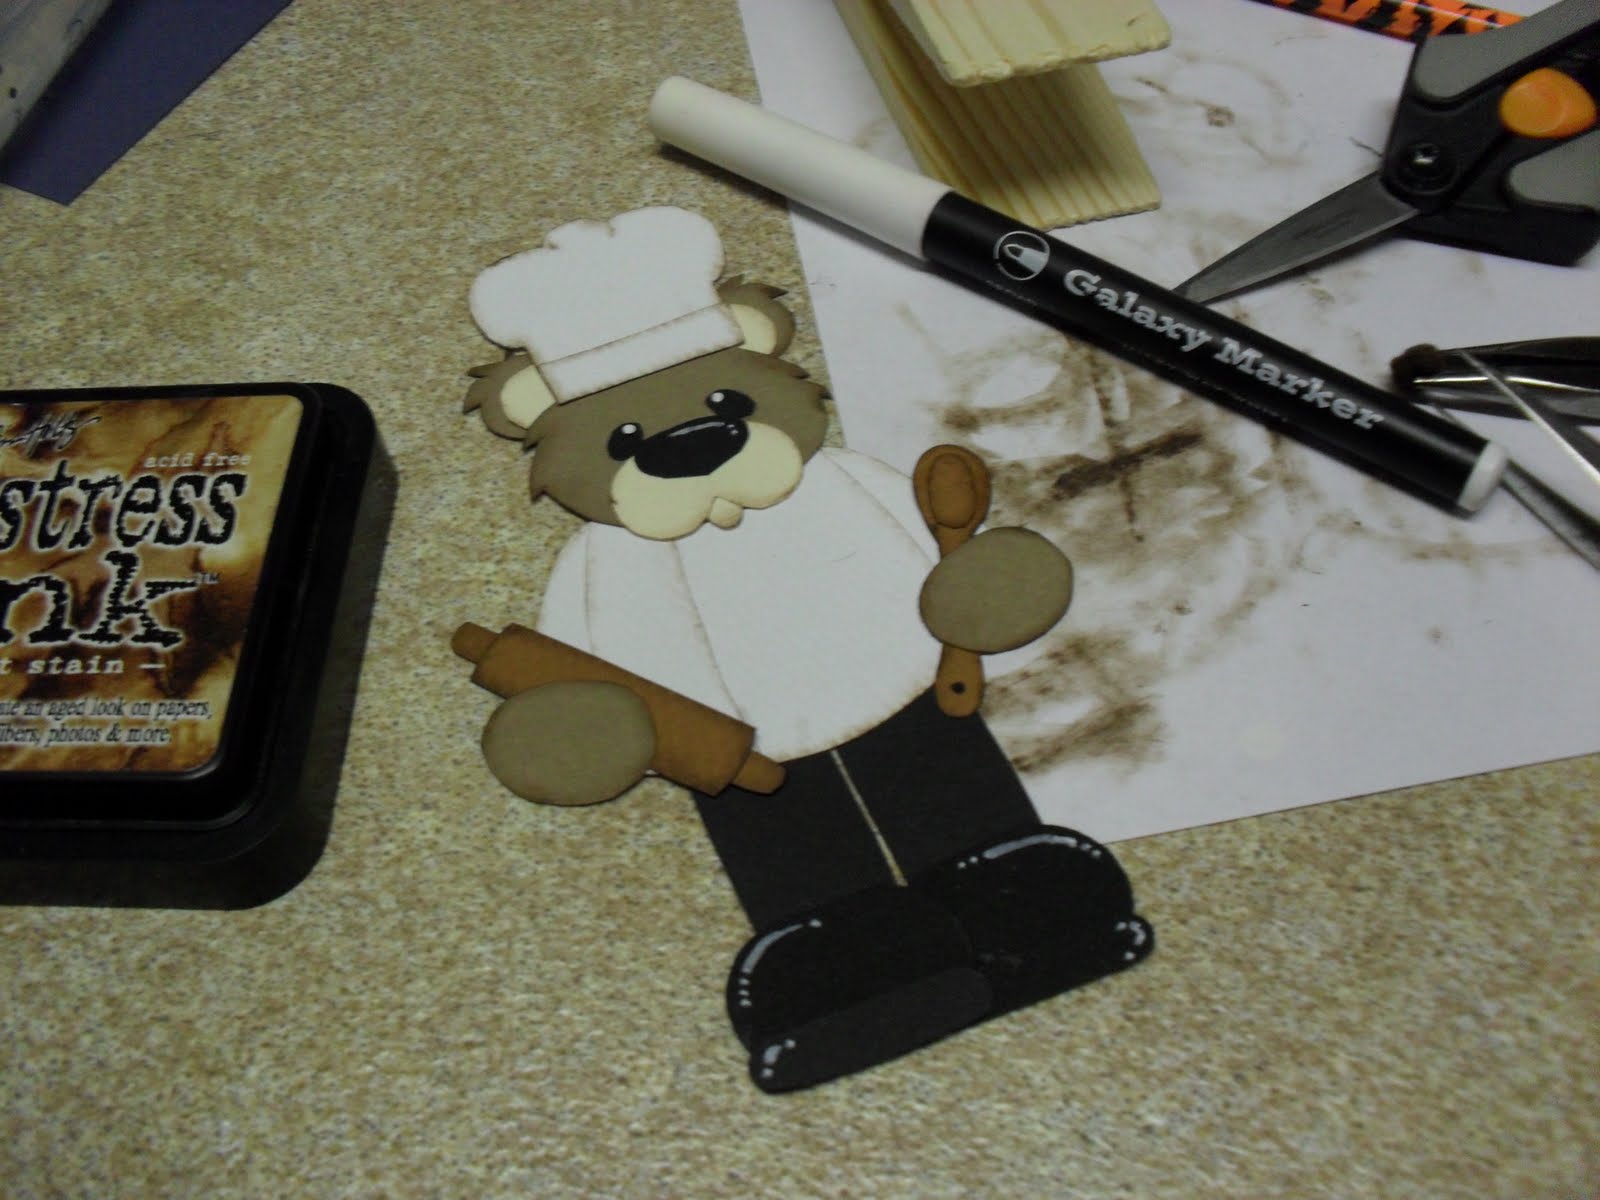
I design a chef hat and shirt. I like my pieces to overlap for gluing purposes and to have room to customize a pattern.

I ink like other people chalk. I like the look of ink better than the look of chalk but either or both are fine. It's a personal preference.

I lay everything out before I start gluing. I cut the legs longer than need so I can fit it to the Jumbo Clothespin. Once I like what I have I start gluing. SOMETIMES I trace around my pattern before I glue so I have a template to follow.

I used a small oval hole punch to make the eyes and a tiny hole punch to make the white "twinkle" in his eyes.

Designing a Wooden Spoon

Wooden Spoon looks good~ LOL

Designing a Rolling Pin

Rolling Pin and Wooden Spoon look nice~

I was going to give him pink cheeks but decided he didn't need them

Double checking to make sure how he will fit on the Jumbo Clothespin

I want space at the bottom so the paper doesn't fray or wear down when sitting on a kitchen counter and used to hold recipes.

His hat looks too plain and so does his chef uniform. I will have to come up with something to make him look more like a chef.

Thinking~

I used my white marker to highlight his shoes and nose.

While I decide what to do to make him more interesting I go ahead and trace around him on my chipboard. I am going to attach the chipboard to the back to give some stability.

I added a strip of white between the legs to cover the chipboard color
 That looks pretty good and I can trim where ever the chip board shows once it is attached.
 Making sure I am attaching it right.
 I attached it to the Jumbo Clothespin
 Making sure it looks right before the glue dries.
 He still looks really plain but NICE~
 AH HA!! He needs a name tag and some buttons. I used a tiny hole punch for the buttons and I just hand cut a tiny name tag.
 I could not decide how to give his chef hat some dimension so
I layered the top and I think it really did the job.
My Pattern:

I am hoping you can print this. They are both the same copy. One is in portrait and the other is in landscape. (I'm new at this, forgive me)

I am only including the chef uniform because I do not have permission to include any LSHD patterns for FREE.
HAVE FUN!
When you complete your version of this workshop's project please go to this blog's Facebook page and post a copy. I will be very excited to see what everyone come up with. If you have questions, concersm issues, etc. Please post them on this blog's Facebook page.
THANKS!!
You do not have to make a recipe card holder. You can make this cute little chef bear to use in a layout, on a card, as a tag etc. Please leave a comment at the bottom and let me know if you like this kind of a workshop and if you are participating~ thank you
You'll need White, Black and Rusty Brown Cardstock.

Made by Corrine Paul
Bear Pattern Used: Little Scraps of Heaven Designs
Chef Uniform designed by Corrine Paul

Supplies Needed:
*6 inch Jumbo Clothespin
You do not need this to make the chef bear.
I bought this one at Hobby Lobby for $2.33.
*Small Hole Punch
*Basic Kit: Scissors, adhesive, cutting system, pencil, white marker, ink or chalk.

For small projects like this I cut my paper in smaller pieces.

I usually rub a pencil across the back of the pattern then transfer the pattern to my cardstock. I cut on the outside of the line to leave room to customize the fit of each piece.

I design a chef hat and shirt. I like my pieces to overlap for gluing purposes and to have room to customize a pattern.

I ink like other people chalk. I like the look of ink better than the look of chalk but either or both are fine. It's a personal preference.

I lay everything out before I start gluing. I cut the legs longer than need so I can fit it to the Jumbo Clothespin. Once I like what I have I start gluing. SOMETIMES I trace around my pattern before I glue so I have a template to follow.

I used a small oval hole punch to make the eyes and a tiny hole punch to make the white "twinkle" in his eyes.

Designing a Wooden Spoon

Wooden Spoon looks good~ LOL

Designing a Rolling Pin

Rolling Pin and Wooden Spoon look nice~

I was going to give him pink cheeks but decided he didn't need them

Double checking to make sure how he will fit on the Jumbo Clothespin

I want space at the bottom so the paper doesn't fray or wear down when sitting on a kitchen counter and used to hold recipes.

His hat looks too plain and so does his chef uniform. I will have to come up with something to make him look more like a chef.

Thinking~
I used my white marker to highlight his shoes and nose.

While I decide what to do to make him more interesting I go ahead and trace around him on my chipboard. I am going to attach the chipboard to the back to give some stability.

I added a strip of white between the legs to cover the chipboard color
 That looks pretty good and I can trim where ever the chip board shows once it is attached.
 Making sure I am attaching it right.
 I attached it to the Jumbo Clothespin
 Making sure it looks right before the glue dries.
 He still looks really plain but NICE~
 AH HA!! He needs a name tag and some buttons. I used a tiny hole punch for the buttons and I just hand cut a tiny name tag.
 I could not decide how to give his chef hat some dimension so
I layered the top and I think it really did the job.
My Pattern:

I am hoping you can print this. They are both the same copy. One is in portrait and the other is in landscape. (I'm new at this, forgive me)

I am only including the chef uniform because I do not have permission to include any LSHD patterns for FREE.
HAVE FUN!
When you complete your version of this workshop's project please go to this blog's Facebook page and post a copy. I will be very excited to see what everyone come up with. If you have questions, concersm issues, etc. Please post them on this blog's Facebook page.
THANKS!!

This is too cute Corrine!!! I'm going to make one of these to keep in my kitchen! I always lose my recipes or they get stuck on the fridge then fall off and get thrown away! Too cute!!!
ReplyDeleteThank you. I have been so excited about this little guy. I think they would make great little gifts for teachers, new neighbors, stocking stuffer and for a very best friend. They are quick easy and FUN to make~
ReplyDelete